As usual, I've been busy with work and haven't had much time to get stuck in to Lode Runner 2.
That said, I did make some time this week to progress with the Editor.
Editor
- Added the escape menu - so far I've got it centred in the screen rather than centred in the world viewport like the original does
- LR2 font loaded
- Mouse snap-to-grid added
- Volume highlighting added (more on that below)
- Tooltips and shortcuts added to all toolbox items
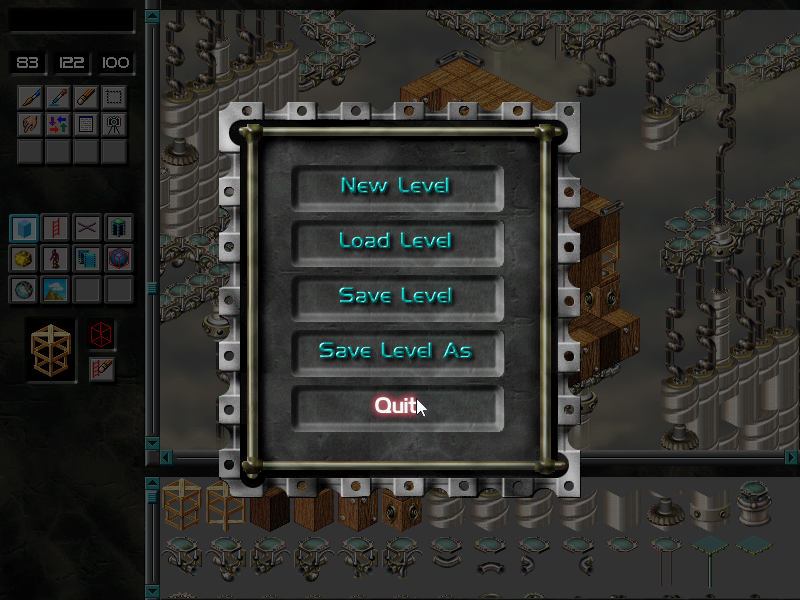
Editor's escape menu
Pixel-perfect mouse picking
The original Editor allows you to shift+click to select a brick and snap to it. After much testing, I couldn't find any way to determine which item the mouse is over so I resorted to the old tried and tested method of using a mouse map.
How it works is relatively simple:
- Each time the level is modified, render it a second time to a RenderTarget using a solid colour, with each brick using a unique colour
- I generate a "random" colour based on the brick index so it's easier to find later and means I don't have to store it
- Store the image as a 1D array via
RenderTarget.GetData - Each time the mouse moves (and shift is held), lookup which colour is at the mouse coordinates
- Undo the above "random" colour to determine the index of the brick
- Render it highlighted!
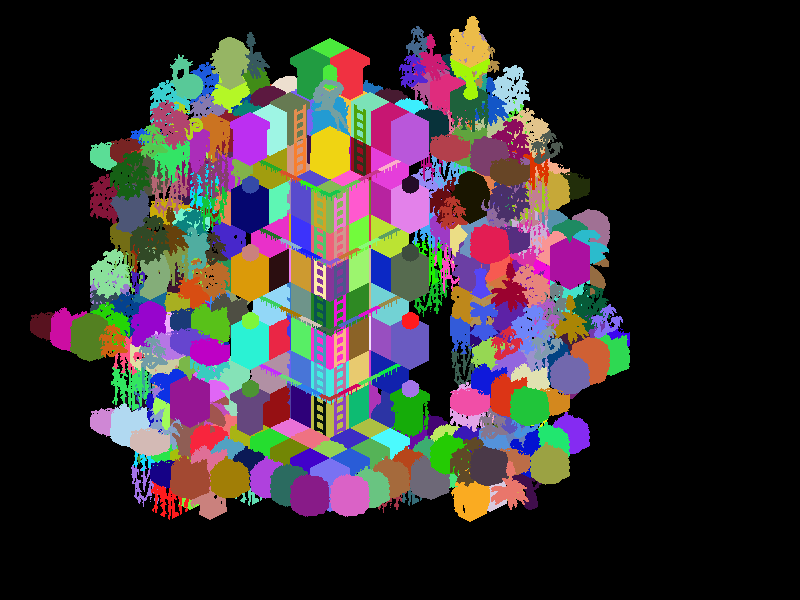
Mouse map for the level 'Swingers'
And here you can see a brief video of it in action and also how LR2 renders a level:
What's next?
Over the coming weeks, I hope to have cleaned up the project so far and continue on with:
- Look in to how LR2's editor seems to know what each properties a brick has. This data gets saved in the level but where does the editor get it from? Is it hardcoded in (I hope not) or does it come from a file I haven't found yet?
- Start the basic tools such as paint & erase